Black & Decker Coffee Maker Instruction Manual: A Comprehensive Guide
This comprehensive guide details operation‚ cleaning‚ and troubleshooting for your Black & Decker coffee maker‚ ensuring optimal brewing and longevity.
Regular cleaning prevents mineral buildup‚ maintaining peak performance‚ as highlighted in available manuals and online resources.
Understanding Your Coffee Maker Model
Black & Decker offers a diverse range of coffee makers‚ each designed with specific features to cater to varying brewing preferences. Identifying your exact model – often found on a label underneath the unit – is crucial for accessing the correct instruction manual and support resources.
Different models may have varying capacities‚ programmable settings‚ and specialized functions like brew strength control or iced coffee options. Familiarizing yourself with your model’s unique capabilities will enhance your coffee-making experience and ensure proper operation. Referencing the model number when seeking assistance from customer support is also highly recommended.
Identifying Key Components
Essential components include the water reservoir‚ responsible for holding the water used during brewing; the filter basket‚ where the coffee grounds are placed; and the carafe‚ which collects the brewed coffee. Understanding each part’s function is vital for proper use.
Additional components may include a power button‚ control panel (for programmable models)‚ and a warming plate to keep coffee warm. Familiarity with these parts ensures safe and efficient operation‚ as well as simplifies cleaning and maintenance procedures. Always refer to your model’s diagram for precise locations.
Water Reservoir
The water reservoir is a crucial component‚ holding the water that becomes your brewed coffee. It’s typically removable for easy filling and cleaning. Always fill with fresh‚ cold water to the desired level‚ indicated by markings on the reservoir.

Avoid overfilling‚ as this can cause overflow during brewing. Using filtered water is recommended to minimize mineral buildup and improve coffee flavor. Regularly cleaning the reservoir prevents scale accumulation‚ ensuring optimal performance and extending the lifespan of your Black & Decker coffee maker.
Filter Basket
The filter basket securely holds the coffee filter and grounds during the brewing process. It’s usually located directly above the carafe. Ensure the basket is properly seated before adding coffee grounds to prevent spills or uneven brewing.
Black & Decker coffee makers often accommodate standard cone-shaped filters. Regularly clean the filter basket after each use to remove any residual grounds and oils. This prevents clogging and ensures a clean‚ fresh taste with every brew. Some models feature a reusable filter for eco-friendly operation.
Carafe
The carafe is the glass or thermal container that collects the brewed coffee. Black & Decker carafes are designed to withstand heat‚ but handle with care to avoid breakage. Always ensure the carafe is properly positioned on the warming plate before starting the brewing cycle.
Some models feature a drip-stop mechanism to pause brewing if the carafe is removed. Regularly clean the carafe with warm‚ soapy water to prevent coffee stains and residue buildup. Avoid abrasive cleaners that could scratch the surface.
Initial Setup & Preparation
Before your first brew‚ proper setup is crucial. Remove all packaging materials and inspect the coffee maker for any damage. Wash the carafe‚ filter basket‚ and water reservoir with warm‚ soapy water‚ then rinse thoroughly. This initial cleaning removes any manufacturing residue.
Position the coffee maker on a stable‚ level surface. Ensure adequate ventilation around the unit. Familiarize yourself with all components before proceeding to the first-time cleaning cycle for optimal performance.
First-Time Cleaning Cycle
To prepare your Black & Decker coffee maker for its first use‚ run a full brewing cycle with water only. Fill the water reservoir to its maximum capacity. Place the empty carafe into position. Without adding coffee grounds‚ initiate a brewing cycle as if making coffee.
This process effectively flushes out any residual manufacturing materials or dust from the internal components. Discard the water after the cycle completes and repeat this process one more time. This ensures a clean‚ fresh brew from the start.
Water Quality & Filtration
The quality of your water significantly impacts the taste of your brewed coffee. Black & Decker recommends using filtered water to minimize mineral buildup and enhance flavor. Hard water can lead to scaling‚ reducing the coffee maker’s efficiency and lifespan.

Consider using a water filter pitcher or installing a filter on your water line. Regularly descaling your coffee maker‚ as detailed later in this manual‚ is also crucial for maintaining optimal performance‚ regardless of water quality.
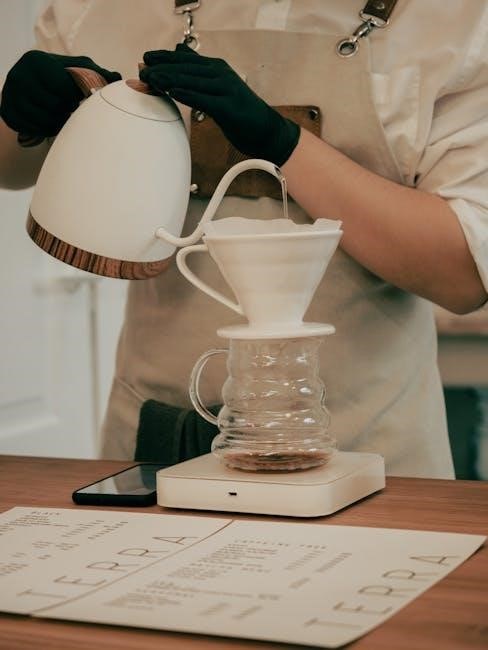
Brewing Coffee: Step-by-Step Instructions
Begin by ensuring the carafe is properly positioned on the warming plate. Next‚ carefully add the desired amount of fresh‚ cold water to the water reservoir‚ observing the water level markings. Then‚ insert a paper filter into the filter basket and add the appropriate amount of ground coffee‚ typically one tablespoon per cup.
Finally‚ press the power button to initiate the brewing cycle. Allow the coffee maker to complete the brewing process before enjoying your freshly brewed coffee!
Adding Water
Carefully open the water reservoir lid located on your Black & Decker coffee maker. Using a clean carafe or measuring cup‚ pour in fresh‚ cold water to the desired level. Refer to the water level markings clearly indicated on the reservoir – these correspond to the number of cups you wish to brew.
Avoid overfilling‚ as this can cause overflow during brewing. Using filtered water is recommended for optimal coffee flavor and to minimize mineral buildup within the machine.
Adding Coffee Grounds
Open the filter basket‚ typically located at the top of the coffee maker. Insert a paper filter‚ ensuring it sits securely within the basket. Add the desired amount of ground coffee – a general guideline is one tablespoon per cup‚ but adjust to your preferred strength.
Ensure the grounds are evenly distributed within the filter. Close the filter basket securely before proceeding to the brewing stage. Avoid using excessively fine grounds‚ as they may clog the filter.
Starting the Brewing Process
Once the water reservoir is filled and the coffee grounds are in place‚ ensure the carafe is correctly positioned on the warming plate. Press the power button to initiate the brewing cycle. Some models feature a ‘Brew Now’ option‚ while others automatically begin brewing upon power activation.
Monitor the brewing process; water will gradually drip into the carafe. Avoid interrupting the cycle mid-brew. The coffee maker will typically signal completion with an audible beep or by switching to a warming mode.
Special Features & Functions
Many Black & Decker coffee makers boast convenient features enhancing the brewing experience. A programmable timer allows pre-setting brew start times for fresh coffee upon waking. The auto shut-off feature provides safety and energy conservation by automatically powering down after a set period.
Some models include brew strength selection‚ enabling customization of coffee boldness. Pause and serve functionality lets you briefly interrupt the brewing cycle to pour a cup mid-brew‚ without causing spills.
Programmable Timer
The programmable timer feature allows you to schedule your coffee to brew automatically. First‚ press the “Program” button. Then‚ set the desired brew start time using the “Hour” and “Minute” buttons. Confirm your selection by pressing “Program” again. Ensure the coffee maker is filled with water and grounds before setting the timer.
This ensures a fresh pot is ready when you wake up or return home. Refer to your specific model’s display for clear time setting instructions.
Auto Shut-Off Feature
Your Black & Decker coffee maker is equipped with an auto shut-off feature for safety and energy conservation. After the brewing cycle is complete‚ the coffee maker will automatically turn off after a predetermined period‚ typically two hours.
This prevents overheating and potential hazards. The feature activates even if the “On/Off” switch isn’t manually turned off. Always unplug the coffee maker when not in use for extended periods.
Cleaning & Maintenance
Regular cleaning is crucial for optimal performance and longevity of your Black & Decker coffee maker. Daily cleaning involves washing the carafe‚ filter basket‚ and lid with warm‚ soapy water. Avoid abrasive cleaners.
Periodically‚ descale the coffee maker to remove mineral buildup. Use a descaling solution or a mixture of water and white vinegar‚ following the instructions in the “Descaling Your Coffee Maker” section.
Daily Cleaning Procedures
After each use‚ unplug the coffee maker and allow it to cool completely. Remove the filter basket and discard the used coffee grounds and filter. Wash the carafe‚ lid‚ and filter basket with warm‚ soapy water. Rinse thoroughly to remove any soap residue.

Wipe down the exterior of the coffee maker with a damp cloth. Avoid immersing the appliance in water. Consistent daily cleaning prevents buildup and ensures fresh-tasting coffee.
Descaling Your Coffee Maker
Regular descaling‚ every 3-6 months‚ removes mineral deposits that affect performance. Mix equal parts white vinegar and water‚ then pour into the water reservoir. Run a full brewing cycle without coffee grounds. Repeat with fresh water 2-3 times to rinse thoroughly.
This process eliminates buildup‚ restoring optimal brewing temperature and coffee flavor. Ignoring descaling can lead to slower brewing and potential damage. Refer to your model’s specific instructions for best results.
Troubleshooting Common Issues
If the coffee maker won’t turn on‚ check the power cord and outlet. Ensure the carafe is properly positioned. Slow brewing often indicates mineral buildup – descale the unit. A weak brew may result from insufficient coffee grounds or coarse grind size.
For persistent issues‚ consult the full instruction manual or Black & Decker’s customer support. Never attempt to disassemble or repair the appliance yourself‚ as this voids the warranty and poses safety risks.
Coffee Maker Not Turning On
If your Black & Decker coffee maker fails to power on‚ first verify the unit is securely plugged into a functioning electrical outlet. Test the outlet with another device to confirm power delivery. Ensure the coffee maker’s power switch is fully engaged.
Check if the carafe is correctly positioned on the warming plate; a safety mechanism prevents operation without it. If issues persist‚ consult the full manual or contact customer support.
Coffee Brewing Too Slowly
If your Black & Decker coffee maker brews exceptionally slowly‚ mineral buildup is a likely cause. Descale the unit following the instructions in the ‘Descaling Your Coffee Maker’ section of this manual. Ensure the filter basket isn’t overfilled with coffee grounds‚ restricting water flow.
Verify the water reservoir is properly seated and not obstructed. A clogged or damaged spray head can also impede brewing speed; cleaning or replacement may be necessary.
Safety Precautions
To ensure safe operation of your Black & Decker coffee maker‚ always unplug the unit before cleaning. Never immerse the appliance in water or any other liquid. Exercise caution when handling the hot carafe and avoid touching hot surfaces during and immediately after brewing.
Keep the appliance out of reach of children. Do not operate the coffee maker with a damaged cord or plug. Ensure the appliance is placed on a stable‚ heat-resistant surface.
Electrical Safety
Prioritize electrical safety when using your Black & Decker coffee maker. Always verify the voltage indicated on the appliance matches your household supply. Never operate the coffee maker with a damaged cord or plug; immediate replacement is crucial. Avoid using extension cords if possible‚ and if necessary‚ ensure they are appropriately rated for the appliance’s wattage.
Do not attempt to repair the coffee maker yourself; contact qualified service personnel for any electrical issues. Unplug the unit when not in use and before cleaning.
Handling Hot Surfaces
Exercise extreme caution when handling hot surfaces on your Black & Decker coffee maker. The carafe‚ warming plate‚ and certain internal components reach high temperatures during and immediately after brewing. Always use the carafe handle and avoid touching the glass directly to prevent burns.
Allow the coffee maker to cool completely before cleaning. Be mindful of escaping steam‚ which can cause scalding. Keep children and pets away from the appliance during operation and cooling periods.
Warranty Information
Black & Decker provides a limited warranty on this coffee maker‚ covering defects in materials and workmanship for a specified period from the date of purchase. This warranty does not cover damage resulting from misuse‚ accidents‚ or unauthorized repairs.
To make a warranty claim‚ retain your proof of purchase and contact Black & Decker customer support. The warranty details‚ including duration and specific coverage‚ are outlined in the separate warranty document included with your appliance.
Frequently Asked Questions (FAQ)
Q: Why isn’t my coffee maker brewing? Ensure it’s plugged in and the power is on. Check the water reservoir is filled and the carafe is correctly positioned.
Q: How often should I descale? Descale every 3-6 months‚ depending on water hardness. Q: Can I use paper filters? Yes‚ use standard basket-shaped filters. Q: What does the ‘clean’ light mean? It indicates a descaling cycle is needed for optimal performance.
Replacement Parts & Accessories
Genuine Black & Decker replacement carafes are available online and through select retailers‚ ensuring a perfect fit and heat resistance. Filter baskets can also be purchased separately‚ alongside water reservoirs if damaged.
Consider purchasing descaling solution specifically designed for coffee makers to maintain optimal performance. Always verify part compatibility with your specific model number before ordering. Third-party accessories may void the warranty.
Understanding Error Codes
While many Black & Decker models don’t display specific error codes‚ some advanced units may indicate issues with a flashing light. A rapid flash often signals a descaling need‚ while a consistent flash could indicate a sensor malfunction.
Consult your model’s specific documentation for detailed interpretations. If a light persistently flashes or the unit fails to operate‚ contact customer support for assistance. Ignoring these signals may lead to further damage.
Tips for Optimal Coffee Flavor
To achieve the best possible coffee flavor‚ use freshly ground beans and filtered water. The correct coffee-to-water ratio is crucial – generally‚ two tablespoons per six ounces of water. Regularly cleaning your coffee maker‚ including descaling‚ prevents mineral buildup that impacts taste.
Store coffee beans in an airtight container‚ away from light and moisture. Experiment with different bean types and grind sizes to discover your preferred flavor profile.
Long-Term Storage Instructions
If storing your Black & Decker coffee maker for an extended period‚ ensure it is completely dry. Thoroughly clean and descale the unit before storage to prevent mold or mineral buildup. Remove the carafe and filter basket‚ washing them separately and storing them in a dry place.
Store the coffee maker in its original packaging‚ if available‚ or a clean‚ dry location away from dust and extreme temperatures. Avoid storing in damp environments.
Contacting Customer Support
For assistance with your Black & Decker coffee maker‚ or if you encounter issues not addressed in this manual‚ please reach out to their dedicated customer support team. Visit the official Black & Decker website for a comprehensive FAQ section and troubleshooting guides.
You can also find contact information‚ including phone numbers and email addresses‚ for direct support. Be prepared to provide your model number and purchase date when contacting support for efficient assistance.