Overview of Heliana’s Guide to Monster Hunting
This 5e supplement delivers ten monster-hunt adventures with multi-wave boss battles‚ new subclasses‚ and robust tracking‚ harvesting‚ and crafting systems. It is available as a flipbook and PDF‚ and a bundled discount covers both parts. It also includes maps‚ tables‚ and a companion app. today.
Publication Details and Availability
Heliana’s Guide to Monster Hunting (5e) was released on February 9 2026 by the independent publisher Killtucky. The supplement is offered in two digital formats: a flip-book version optimized for online reading and a high-resolution PDF suitable for printing or offline use. Both formats include the full text‚ stat blocks‚ and printable maps‚ and they are distributed through the publisher’s official website and major ebook platforms such as DriveThruRPG and DMsGuild. Buyers can purchase the flip-book or PDF individually‚ or take advantage of a limited-time bundle that provides both parts of the guide at a reduced price. The bundle discount is advertised as “Both Parts Discount Offer” and applies to the complete set of ten monster-hunt adventures and accompanying mechanics. All purchases grant immediate download access‚ and the files are DRM-free‚ allowing users to store them on any device; For readers who prefer a physical copy‚ a print-on-demand paperback is planned for a future release‚ but the digital editions remain the primary distribution method as of the current release date. Hosted on a secure CDN‚ the files work with common e-readers such as Kindle‚ iBooks‚ and standard PDF viewers. Purchasers receive a license key that unlocks free future updates‚ and the guide is indexed in the D&D Beyond community content catalog for easy reference during sessions. Support is provided via email‚ and a FAQ page addresses free installation questions now!!
Format Options: Flipbook and PDF
Heliana’s Guide to Monster Hunting is offered in two digital formats to suit different play styles. The flipbook version‚ released on February 9‚ 2026 by the publisher killtucky‚ mimics the feel of a physical book with realistic page‑turn animations‚ clickable chapter links‚ and embedded maps that zoom in with a single tap. This interactive layout is ideal for game masters who prefer a visual reference during sessions‚ allowing quick navigation between the ten monster‑hunt adventures and the multi‑wave boss battle mechanics without losing sight of tables or illustrations.
The PDF edition provides a classic‚ printable experience. Fully searchable‚ the PDF includes high‑resolution artwork‚ stat blocks‚ and optional handout sheets that can be printed on standard letter‑size paper or exported to tablets for on‑the‑go reference. Both formats contain the same core content‚ and purchasers can acquire the complete two‑part set at a bundled discount‚ making it a cost‑effective choice for groups that want access to every subclass‚ tracking system‚ and crafting rule.
- Flipbook: interactive navigation‚ animated page turns‚ instant zoom on maps‚ ideal for screen‑based play.
- PDF: searchable text‚ printable handouts‚ offline access‚ compatible with e‑readers and tablets.
- Bundle Deal: buying both parts together unlocks a special price reduction‚ encouraging full‑campaign adoption.
Download now and hunt away.!!!
Core Content: Adventures and Boss Battles
The guide features ten monster-hunt adventures‚ each climaxing in multi-wave boss battles that test tactics and resources. Detailed encounter tables‚ terrain maps‚and loot charts give DMs ready-to-playsessions that scale from low to epic threats
Ten Monster Hunt Adventures
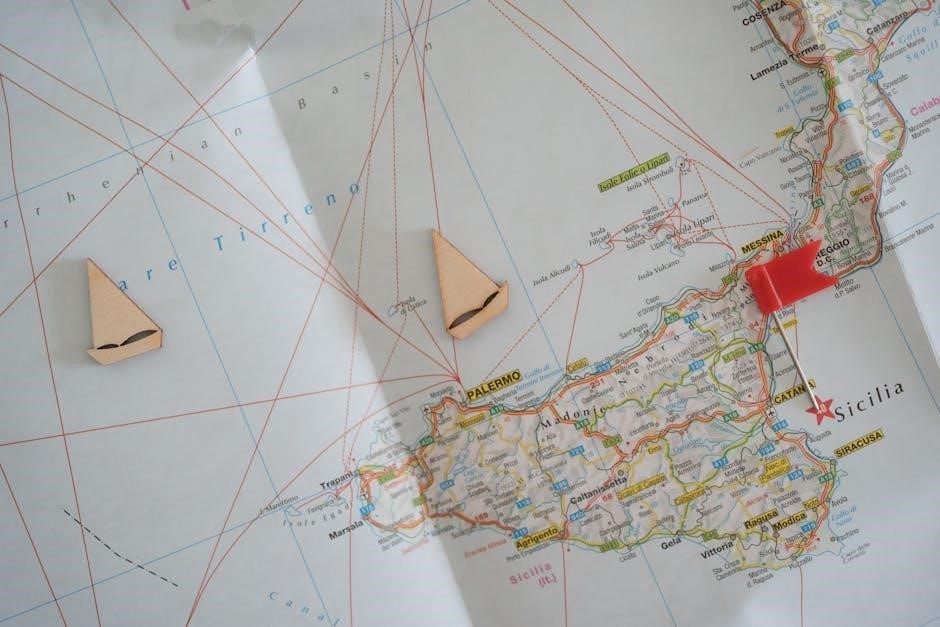
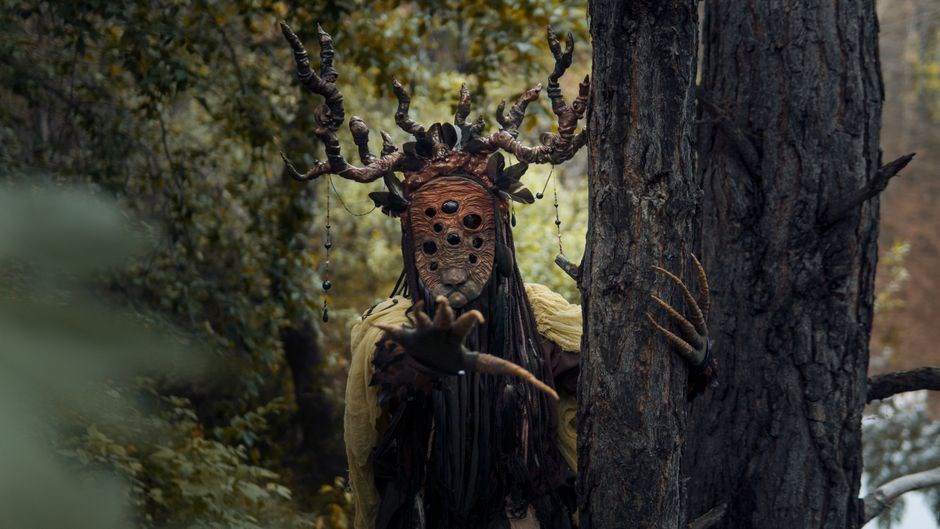
Heliana’s Guide delivers ten compact hunts that can slot into any 5e campaign. Whispering Woods pits the party against shadow‑fang wolves and a three‑phase alpha spirit. Molten Maw sends adventurers into a lava‑filled cavern to defeat a magma‑infused salamander whose eruptions change the terrain. Sunken Sanctum drops explorers into a flooded temple where a kraken‑like leviathan guards relics and forces a multi‑wave water battle. Gilded Grotto challenges hunters with a crystal‑scaled drake that reflects spells across a glittering cavern. Ironclad Keep features a clockwork golem whose mechanical phases require precise timing. Veiled Bazaar reveals a shapeshifting mimic queen in a bustling market‚ turning commerce into chaos. Ravenous Rift opens a planar tear spawning aberrant creatures and a multi‑dimensional final horror. Storm‑torn Spire climbs a lightning‑charged tower to face an elemental that summons thunderous minions. Frostbitten Fjord hunts a white‑scaled sea serpent in icy waters‚ with freezing conditions that hamper movement. Blighted Bog tracks a plague‑bearing swamp hag whose toxic aura escalates each wave‚ demanding careful resource management. Each adventure includes detailed maps‚ encounter tables‚ and optional side quests‚ and PDF version supplies printable handouts‚ stat blocks‚ and ready grids for play now.
Multi-Wave Boss Battle Mechanics
Heliana’s Guide introduces a layered encounter framework that splits each major antagonist into three distinct waves. The first wave acts as a “vanguard”—a pack of lesser minions that test party positioning and resource management. Their defeat triggers the arrival of the second wave‚ where the boss emerges with a unique set of abilities tied to the environment of the hunt zone. This phase emphasizes dynamic terrain: collapsing cliffs‚ shifting sand dunes‚ or erupting geysers that impose advantage/disadvantage conditions‚ force movement‚ or grant temporary resistances. The final wave is the “true showdown‚” where the boss reaches a heightened “Rage” or “Form” state‚ gaining bonus hit points‚ new attack patterns‚ and the ability to summon one last wave of elite minions. Each wave has its own initiative order‚ allowing the DM to interleave player actions with monster tactics‚ creating a cinematic rhythm.
Mechanically‚ the guide provides a “Wave Tracker” table that records damage thresholds‚ environmental triggers‚ and morale checks. When a wave’s health drops below a preset percentage (typically 50 % for wave 1 and 30 % for wave 2)‚ the DM rolls on the “Escalation” chart to determine which new hazards appear. Additionally‚ the boss’s “Adaptive Tactics” feature lets it swap one of its known abilities for a new one each wave‚ ensuring that players cannot rely on a single strategy throughout the encounter. The system also integrates the new tracking and harvesting rules: after each wave‚ surviving monsters yield specific resources that can be harvested on the spot‚ granting temporary buffs or crafting components for the next wave.
To keep the experience balanced‚ the guide includes “Difficulty Scaling” guidelines. By adjusting the number of minions‚ the potency of environmental effects‚ or the boss’s Rage threshold‚ DMs can tailor the encounter for parties of varying levels. The multi‑wave design encourages teamwork‚ resource conservation‚ and strategic planning‚ making each boss battle feel like an epic saga rather than a single‚ static fight.
Beyond combat‚ each wave integrates resource gathering. After a wave ends‚ the DM awards harvested parts—scales‚ claws‚ alchemical glands—that feed directly into the crafting tables later in the guide. Players can spend these items to forge temporary weapons or potions granting advantage on the next wave‚ creating a feedback loop that rewards clever planning. Optional “Narrative Cue” cards let the DM describe shifting winds or sudden darkness‚ granting inspiration or imposing morale checks‚ keeping tension high throughout the encounter. Surviving all waves grants bonus XP and a unique trophy today!!
New Subclasses and Play Options
Heliana’s guide introduces three Loot Tavern subclasses: the Beastmaster‚ the Riftblade Alchemist‚ and the Graveyard Shaman. Each offers unique mechanics for monster hunting‚ plus optional party play modes that integrate tracking‚ harvesting‚ and crafting.!
Subclass Highlights from Loot Taverns
Heliana’s Guide adds three fresh subclasses tailored for monster‑hunting campaigns. The Barbarian Path of the Ember‑Stalk swaps brute force for flame‑infused tracking‚ granting advantage on Survival checks after marking a foe and delivering fire‑enhanced strikes. At 10th level the “Scorching Roar” wave forces nearby enemies to save or take lingering damage.
The Rogue Shadow‑Tether focuses on stealth and binding. A special tethered dagger imposes a “Tethered Condition” that slows the target and makes it vulnerable to sneak attacks. “Phantom Step” at 7th level lets the rogue teleport up to 30 feet to the tethered creature’s line of sight‚ while the “Hunter’s Kit” tools improve harvesting efficiency.
The Cleric of the Verdant Hunt blends divine magic with nature‑based tracking. Its “Nature’s Insight” channel divinity gives advantage on Perception and Investigation when reading monster traces. At 14th level the cleric can cast Commune with Nature as a ritual to locate any creature within a 5‑mile radius‚ and the “Harvest Blessing” turns harvested parts into temporary hit points for allies.
All three subclasses integrate with the guide’s tracking‚ harvesting‚ and crafting rules‚ and Helix Sleep’s sponsorship funded the detailed artwork that showcases each subclass’s signature gear and abilities.

Each subclass also provides distinct background hooks‚ optional role‑playing prompts‚ and exclusive magical items that reward care tracking and successful harvests.

Tracking‚ Harvesting‚ and Crafting Systems
Heliana’s Guide introduces a fully fleshed‑up ecosystem for monster hunters‚ turning each encounter into a resource loop that fuels the party’s progression. After a creature falls‚ the new tracking rules let players follow lingering scent‚ claw marks‚ or magical residue‚ granting advantage on survival checks and revealing hidden lairs. The harvesting system assigns tiered loot tables based on creature size‚ rarity‚ and the tools used‚ so a well‑equipped ranger can extract rare hides‚ alchemical glands‚ or enchanted bone fragments. Those raw materials feed directly into the crafting mechanics‚ which feature modular blueprints‚ proficiency‑based quality tiers‚ and optional downtime activities. Players can forge weapons that gain bonus damage against the hunted species‚ craft armor with resistance to specific attack types‚ or brew potions that grant temporary tracking senses‚ and potions that grant advantage on strategic planning. All tables are presented in both flipbook and PDF formats‚ with clear icons and colour‑coded rows for quick reference at the table. A companion spreadsheet is included in the PDF download‚ automating ingredient totals and crafting time calculations‚ so the DM can focus on narrative rather than bookkeeping. By integrating tracking‚ harvesting‚ and crafting into a seamless loop‚ the supplement encourages strategic planning‚ resource management‚ and a deeper sense of reward after each monster hunt; Explore these mechanics to transform every hunt into a lasting legacy.!!!
Companion Materials and Supplements
The guide bundles extra maps‚ encounter tables‚ and a printable tracker sheet. Buyers receive a discount when purchasing PDF‚ and flipbook together‚ plus a QR‑linked companion app that streamlines harvesting rolls and crafting recipes for each monster.
Both Parts Discount Offer
Complete Collection Discount: Adventurers seeking the definitive experience can purchase both parts of Heliana’s Guide to Monster Hunting as a bundled product at a significant markdown directly from the official monsterhunting5e.com storefront. Published by killtucky on 2026-02-09‚ the flipbook version showcases quality. This comprehensive package unifies Part One and Part Two‚ granting immediate access to the full library of ten monster hunt adventures‚ multi-wave boss battle mechanics‚ exclusive subclasses from Loot Taverns‚ and the deep tracking‚ harvesting‚ and crafting progression systems.
- Digital Delivery: Includes bookmarked‚ searchable PDFs plus interactive flipbook editions for browser reading on any device.
- Physical Options: Collector’s grade hardcovers with premium paper‚ alternate cover art‚ and sewn bindings are available as a combined shipment.
- Virtual Tabletop Support: Bundled purchases often include complimentary Foundry VTT‚ Roll20‚ or Fantasy Grounds module keys for seamless digital play.
- Automatic Savings: The bundle price reflects a twenty to thirty percent reduction compared to acquiring each volume individually at standard retail cost.
The discount applies instantly at checkout without requiring coupon codes. Author Jess (Heliana) acknowledges community patience during development delays caused by health challenges and full-time writing focus‚ ensuring the final product meets high quality standards. Secure the complete guide today to elevate your campaign with epic hunts‚ detailed ecology lore‚ and endless crafting possibilities. Visit site to claim offer and join streaming community watching WIP art showcases.

Community Engagement and Streaming
Creators host live streams showcasing WIP monster designs‚ boss battle playthroughs‚ and behind‑the‑scenes author commentary Fans join chat‚ ask questions‚ and see art reveals. Regular updates keep the community excited about new hunt content releases.!
Live Streams and WIP Showcases
The author actively engages the community through frequent live streams showcasing work-in-progress content‚ including major big bad boss monster art and stat block development for the upcoming encounters. One stream highlighted the creation of a main antagonist‚ inviting viewers to witness the artistic process with the tagline come for the art stay for the dumb. The creator also recently addressed a prolonged absence and dead air‚ citing top surgery‚ COVID-19 recovery‚ and intense full-time focus on the book for a while alongside crippling social anxiety struggles. These sessions offer transparent insight into the supplement’s ongoing evolution. Additionally‚ the official website monsterhunting5e.com serves as a hub for special links and updates like the JessSpecial offer. Third-party creators and sponsored streams‚ such as those backed by Helix Sleep‚ provide deep dives into subclasses and mechanics‚ further building anticipation. Viewers can watch full flip-throughs and reviews assessing the book’s quality‚ often asking have I found the greatest DnD Supplement Book ever while diving into the craziest 5e supplement ever opened. Oh god are we actually doing this a Monster Hunter inspired book of dnd goodness check the link and see. This direct developer-to-audience pipeline fosters a strong connection‚ turning the development cycle into a shared event. Regular WIP showcases ensure backers and fans remain invested in the final product’s quality and release timeline. Fans appreciate transparent updates and the chance to see behind the scenes of monster design. Community feedback during broadcasts influences final stat blocks ensuring a polished experience for all.

Author Insights and Development History
Heliana’s Guide to Monster Hunting emerged from a series of livestreams and personal journals kept by the creator‚ a longtime D&D enthusiast who announced the project publicly in early 2025. After a period of intense playtesting‚ the author opened a “WIP showcase” on a popular streaming platform‚ inviting fans to watch the design of the main antagonist and to provide feedback on encounter balance. Those sessions revealed the author’s candid side: a heartfelt apology for “dead air” caused by a combination of top‑surgery recovery‚ a bout of COVID‑19‚ and chronic social anxiety‚ which forced a temporary pause in production. Determined to finish the book‚ the creator shifted to full‑time development in late 2025‚ collaborating with the art team at Killtucky and securing a sponsorship from Helix Sleep‚ which helped fund the high‑quality illustrations and the companion app. The first part of the supplement was officially released on February 9 2026 as a flipbook and PDF‚ both distributed through the publisher’s online store. The author documented the timeline on a personal blog‚ noting that the initial draft took three months‚ followed by a six‑week polishing phase that incorporated community‑sourced monster ideas and refined the new subclasses introduced in the Loot Taverns section. A second “both‑parts” discount bundle was announced shortly after launch‚ encouraging players to acquire the complete adventure series at a reduced price. Fans adore.